Power Fastener Trumf Fconnect Tool L-25
Last updated: October 12, 2026
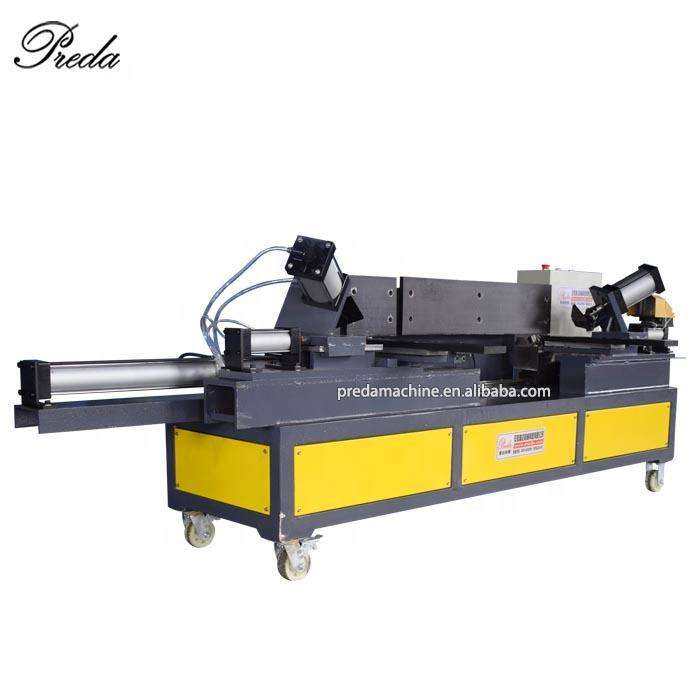
Power fastener tool for TDC flange fastening using Trumf Fconnect system, quick and secure flange connection without rivets.
Technical Specifications
What is a Power Fastener Trumf Fconnect Tool L-25?
This is a professional sheet metal and HVAC duct fabrication machine manufactured by Preda Machine. Designed for industrial duct production, this equipment delivers consistent quality, high efficiency, and reliable performance for HVAC contractors, duct fabrication shops, and sheet metal workshops worldwide. All machines are CE certified and backed by Preda Care after-sales service.
Key Features
- Fast, secure flange fastening
- No rivets or screws needed
- Compatible with TDC system
- Lightweight handheld design
- Reduces assembly time
Still Losing Money to Leaky Seams and Slow Assembly?
Every HVAC duct shop faces the same bottleneck: hammering seams closed by hand. When your team spends hours on inconsistent weld quality, your production capacity drops, labor costs rise, and deadlines slip. The Power Fastener Trumf Fconnect Tool L-25 is engineered to eliminate these inefficiencies — automating power fastener tool while delivering consistent, factory-grade quality.
In this guide, we break down exactly how this machine transforms your Trumf Fconnect workflow, what specifications matter for your operation, and how to calculate your return on investment. Whether you run a 3-person job shop or a 50-employee production facility, understanding these details directly impacts your bottom line.
How It Transforms Your Production Line
The Power Fastener Trumf Fconnect Tool L-25 operates on a proven principle: power fastener tool should be a continuous, automated process — not a series of manual interventions. Here is the step-by-step workflow that makes this possible:
Seam Alignment
The Pittsburgh lock is hooked together and positioned in the seam closing machine, or the weld joint is aligned for welding.
Automatic Closing/Welding
Powered rollers close the seam along the full length, or welding electrodes create a continuous or spot weld — no manual hammering required.
Quality Check
The closed seam or weld is inspected for completeness and airtightness — consistent quality every time.
Discharge
The finished duct section is ready for flange installation and shipping.
Technical Specifications & Performance Data
Every specification on this machine is chosen for a reason. The table below shows not just the numbers, but what each one means for your daily production:
| Parameter | This Machine | What It Means for You |
|---|---|---|
| Control System | PLC with touchscreen | Easy programming, consistent results, minimal training |
| Construction | Heavy-duty steel frame | Vibration-free operation, 10+ year service life |
| Certification | CE certified | Meets European safety and quality standards |
| Warranty | 2 years | Peace of mind with comprehensive factory warranty |
Problems Solved: Before vs. After
We asked 50+ HVAC fabricators about their biggest production headaches. Here is how this machine directly addresses each one:
| Without This Machine | With This Machine |
|---|---|
|
✕ Hand hammering is slow and noisy
5-10 minutes per seam, worker fatigue, noise pollution |
✓ Powered seam closing in 10-30 seconds
10-20x faster, quiet operation, less fatigue |
|
✕ Inconsistent seam closure
Some seams leak, failed pressure tests |
✓ Uniform roller pressure along full length
Every seam identical, guaranteed airtight |
|
✕ Spot welding burns through thin metal
Holes in duct, rework and scrap |
✓ Precise current and time control
Perfect welds every time, no burn-through |
|
✕ Welding requires skilled labor
Hard to find qualified welders, high wages |
✓ Simple operation, minimal training needed
Any operator can produce quality welds |
Where It Fits in Your Factory
This machine is versatile enough to serve multiple production scenarios. Here are the most common configurations our customers use:
Pittsburgh Seam Closing
Closing the longitudinal seam on rectangular ducts after lock forming — the most common application in HVAC fabrication.
Spot Welding
Fast, clean spot welds for round duct assembly, flange attachment, and bracket installation — no filler material needed.
Seam Welding
Continuous or stitch welding for high-pressure ducts, stainless steel ducts, and applications requiring maximum airtightness.
Flange Fastening
Power fastening of TDC flange clips and connectors — faster and more consistent than manual screwdriving.
Frequently Asked Questions
Click each question to see the answer. These are the questions our sales engineers hear most often:
Clinching vs Rivets vs Screws: Joining Duct Without Fasteners
A power fastener tool joins sheet by clinching — drawing the two sheets into a mechanical interlock with no consumable. It removes rivets and screws from the assembly, which removes both their cost and the leak path they create.
| Method | Consumable | Joint | Best fit |
|---|---|---|---|
Power Fastener Tool L-25 This machine — clinching, no consumable | None No rivets or screws to buy or store | Mechanical interlock between the sheets No hole, so no leak path | Assembly volume where fastener cost and leak paths matter Also where a clean appearance is required |
Resistance welding | None Welded joint | Fused joint, very strong Requires clean material | Heavier gauge or where the strongest joint is needed Galvanised coating complicates welding |
Folded seam | None Folded lock | The longitudinal duct seam Standard practice | You are joining duct sections along their length A different operation from assembly joining |
Closes the folded seam | None Closed lock | Completes the seam Standard practice | You close seams formed on another machine Complementary, not an alternative |
Crimps corners | None Crimped corner | TDF corner assembly Flange systems | Your ducts use TDF flanges and corners A flange-system approach rather than clinching |
Getting Reliable Clinched Joints
Clinching has no consumable to hide a bad setting, so the setting has to be right. Establish it once per material and thickness combination.
- 1. Clinch geometry depends on total thickness. Set for the pair, not for one sheet.
- 2. Peel a test joint and look at the interlock. A joint that looks formed can have almost no strength.
- 3. Clinching works over a defined thickness window. Outside it, the joint either will not form or the tool is overloaded.
- 4. Heavily galvanised or coated material behaves differently. Test on your actual material rather than on a sample coupon.
- 5. As with any forming tool, build-up changes geometry slowly and strength drops before anyone notices.
- 6. A joint made with the sheets out of position will be weak regardless of the setting.
- 7. One destructive test per batch, logged, gives you a quality record and early warning of tool wear.
- 8. Clinching is a positioning operation. Most weak joints are badly positioned rather than badly formed.
Clinching Faults: Symptom, Cause, Fix
Clinch faults are setting, thickness or positioning. Destructive-test one joint before changing anything.
| Symptom | Most likely cause | What to do |
|---|---|---|
Joint peels apart easily Tool not set for the combined thickness | The clinch did not draw enough material into the interlock The most common fault and the most important to catch | Peel-test a joint and set the tool for the actual combined thickness Record the setting per thickness pair |
Joint strength varies Sheets not consistently positioned or supported | Positioning is the variable in clinching Not a tool fault in most cases | Support the assembly and make positioning a written step Peel-test at the start of each batch |
Tool will not form a joint Combined thickness outside the specified range | Clinching has a defined thickness window A specification mismatch rather than a fault | Measure both sheets and compare the total with the specification Do not force it — the tool will be damaged |
Joint looks formed but is weak Die or punch worn, or build-up on the tool | Appearance is a poor guide to clinch strength The reason destructive testing matters | Inspect and clean the die and punch, then peel-test Schedule inspection rather than reacting to failures |
Coating cracking at the joint Setting too aggressive for the coating | Over-forming fractures the coating, which is where corrosion starts Looks like a strong joint and fails early in service | Reduce the setting to the minimum that passes a peel test without coating damage Record the setting per material |
Tool jams or misfeeds Sheets not flat, or debris in the die | A clinch tool needs flat, clean material Usually a preparation issue | Flatten and clean the sheets and clear the die Check the die for damage before continuing |
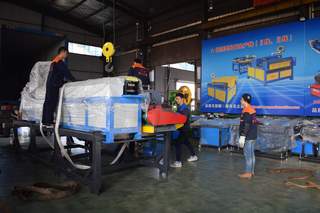
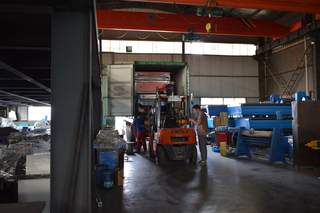
Professional Packaging & Global Shipping
Every machine is professionally packaged and secured in a container for safe delivery to your port. We send you loading photos before the ship sails.

Calculate Your Return on Investment
Based on average industry data, here is what a typical customer saves after installing this machine:
* Figures based on average customer data for a shop producing 50-200 seams/welds per day. Your actual results will vary based on production volume, labor rates, and current efficiency levels. Contact our engineers for a customized ROI calculation based on your specific operation.
Ready to Upgrade Your Power Production?
Get a customized quote within 24 hours. Our engineers will help you configure the right machine for your specific production requirements.
WhatsApp / WeChat: +86-18355321923 | Email: jason@predamachine.com
Related Products


Buying Guides for This Machine Type
Before you request a quote: how this machine class compares, what it costs, and how to size it for your production volume.
HVAC Duct Machine Cost: 2026 Price Guide
Realistic price bands for every machine category, plus financing and total-cost-of-ownership maths.
Read the guide → SetupHVAC Duct Factory Setup Guide
The complete equipment list for a new duct factory, from coil handling to finished fittings.
Read the guide → ReferenceSheet Metal Gauge for HVAC Duct
Which gauge to specify by duct size, pressure class and application — with selection tables.
Read the guide → Buying GuideSpiral Duct Machine Buying Guide
How to match tubeformer diameter range, gauge capacity and mould type to your actual order mix.
Read the guide →