A spiral duct machine turns a narrow flat strip into a continuous round tube wrapped with a helical seam. Operators and buyers often read the diameter range on the product page and stop there, but the strip that feeds the forming head, the coil behind it and the seam geometry are what decide whether a given diameter runs cleanly. This guide explains how feeding strip width and coil condition relate to finished round duct diameter and gauge, how a fixed-mould tubeformer keeps seam geometry consistent across the range, and what the first-section check should cover after a diameter change. The machine figures used below come from the Preda PD-1600 fixed-mould tubeformer and the heavy-duty PD-2000, so the setup discussion stays tied to real specifications rather than generic catalog assumptions.
How the Strip Becomes a Helical Tube
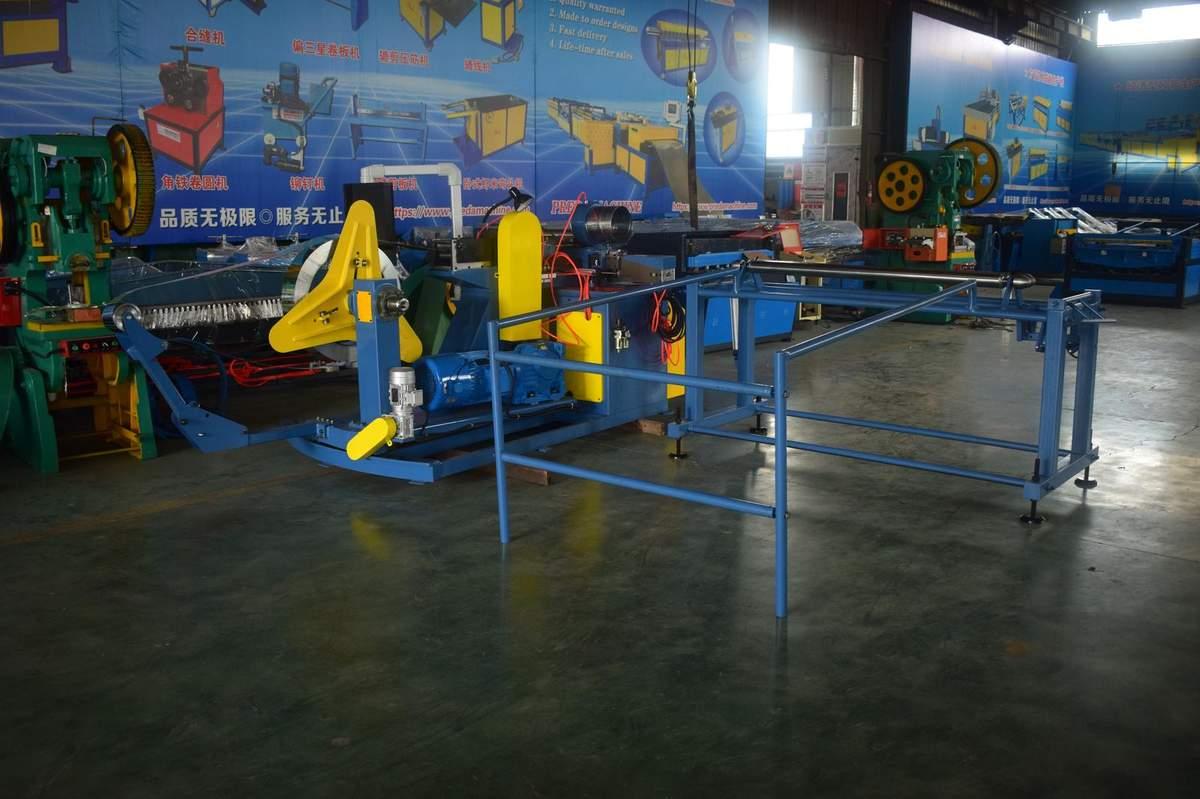
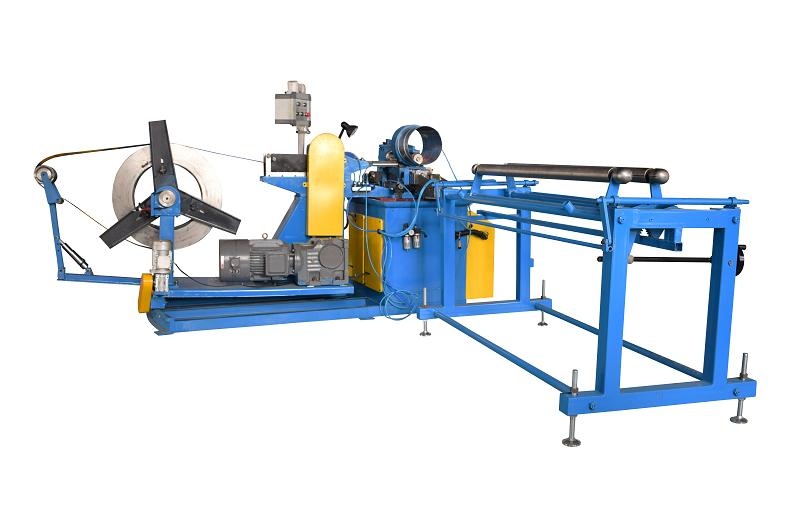
On a spiral tubeformer, strip is fed from the coiler through leveling and guide rollers into the forming head, where rollers bend it around a fixed mandrel or mould while the lock seam is rolled and closed along the helix. Because the strip advances at an angle to the tube axis, the seam winds continuously around the circumference rather than running straight along one side. That helical path is what gives spiral round duct its rigidity: the closed seam distributes stiffness around the whole tube rather than along a single longitudinal joint.
The strip width matters at this forming stage because it sets how much material wraps each turn and how the seam pocket and male edge land on the mating edge. A strip aligned square to the feed runs through the rollers with even edge position; a strip that wanders to one side feeds an off-centre seam, which shows up as a seam that sits high or low along the helix. The forming head does not correct a wandering strip on its own, so guide alignment and coil centring are checked before the run rather than after a length of off-round tube has been produced.
Feeding Strip Width Versus Finished Diameter
It helps to separate two widths that are easy to confuse. The feeding strip width is the width of the flat coil stock the machine pulls through the rollers; on the PD-1600 the feeding strip is 137 mm. The finished diameter is the round duct the machine produces, which the PD-1600 covers from 100 mm to 1600 mm. These are not the same number: the flat strip is the material the helix is built from, while the diameter is the round result after the strip has been wrapped and seamed.
Across a diameter range, the strip must be wide enough to form the circumference and carry the seam allowance, yet narrow enough to feed the forming head cleanly. Larger diameters need a longer material path around the circumference; the machine's fixed mould and roller set govern how that path is formed. The coil behind the strip supplies continuous material, and coiler capacity matters for shift-long runs: the PD-1600 carries a 1200 kg coiler so production does not stop for frequent reloads. Matching the coil gauge and width to the active diameter before threading avoids a re-thread partway through a run.
How Diameter and Gauge Affect the Setup
Small branch diameters run with tighter curvature, so the forming rollers bend the strip more sharply per unit length; larger mains wrap a gentler radius. The working speed band on the machine covers both: the PD-1600 runs 1-38 m/min across its range, which lets a small diameter be fed carefully while a larger section can run faster once the seam is consistent. Gauge changes the load on the rollers as well. Heavier strip needs the rollers to close firmly enough to form the seam without springback, while lighter gauge must not be over-compressed so the zinc surface and seam pocket stay intact.
The table below frames the setup points by diameter class. It describes where the operator's attention goes on each class rather than assigning a precise strip width per diameter, because the feeding strip on this machine is a fixed 137 mm and the mould set handles the diameter change.
| Diameter class | Typical duct role | Forming behaviour | Setup and check focus |
|---|---|---|---|
| Small diameters (around 100-300 mm) | Branch drops, take-offs, small connections | Tighter curvature per strip length; seam wraps more turns per metre | Guide alignment, seam pocket engagement, first-section roundness |
| Medium diameters (around 300-800 mm) | Commercial supply and return mains | Balanced wrap and seam load; steady feed through the rollers | Strip centring, roller pressure for the active gauge, seam evenness |
| Large diameters (around 800-1600 mm) | Main runs, exhaust and larger ventilation duct | Gentler radius; wider material path around the circumference | Mould/roller position for the size, seam closure along the full length, coiler supply |
| Extra-large class (to 2000 mm) | Industrial mains, high-volume ventilation | Reinforced heavy-duty frame and heavier gauge handling | Heavy-duty machine class, flying shear or slitter cut-to-length |
Gauge Bands and Machine Class
Thickness range is another setup boundary that should match the heaviest regular gauge on the order book, not the lightest section. The PD-1600 handles 0.4-1.2 mm strip, suited to commercial galvanized, stainless and aluminum work in the standard diameter band. The heavy-duty PD-2000 extends to 0.5-1.5 mm and up to 2000 mm diameter for larger mains and industrial ductwork, where the heavier gauge and reinforced frame carry the extra load. Running a gauge outside the machine's band tends to show as springback, seam looseness or roller strain rather than a clean closed lock.
Cut-to-length follows the formed tube. The PD-1600 uses attached roller cutting, with plasma cutting as an option; the PD-2000 uses a flying shear or slitter to cut the continuous tube to programmed length without stopping the run. The choice between mechanical and plasma/mechanical cutoff ties back to gauge and edge finish, a separate decision from the diameter and strip setup discussed here.
| Specification | PD-1600 Fixed-Mould Tubeformer | PD-2000 Heavy-Duty Tubeformer |
|---|---|---|
| Diameter range | 100-1600 mm | Up to 2000 mm |
| Material thickness | 0.4-1.2 mm | 0.5-1.5 mm |
| Working speed | 1-38 m/min | 1-30 m/min |
| Feeding strip | 137 mm strip | Heavy-duty strip for larger diameters |
| Coiler capacity | 1200 kg coiler | Heavy-duty continuous feed |
| Cutting | Roller cutting attached; plasma optional | Flying shear or slitter |
| Construction | Fixed mould, consistent seam geometry | Mould type, heavy-duty frame, 15 kW motor |
| Position in the lineup | Mid-range commercial spiral workhorse | Heavy-duty large-diameter industrial class |
Diameter Changeover and the First-Section Check
After a diameter change, the first section is the gate for the rest of the batch. The setter confirms the mould or roller set matches the new size, the strip is centred in the guides, and the seam rollers close the pocket evenly along the helix. On the first length, check the finished diameter against the drawing, look for a seam that sits evenly around the tube, and inspect the cut edge for a clean lock rather than a lifted or partially closed seam. Catching these on the first section avoids a stack of off-round tube that has to be reworked or scrapped.
Coil matching belongs to the same changeover: the next coil queued on the coiler should match the active gauge and width so the swap does not introduce a different strip mid-run. A two-coil or high-capacity coiler keeps material available, but it does not remove the need to confirm the queued coil matches the current program. Operator knowledge of seam engagement and gauge feel still enters at this point; the machine repeats the forming, but the setter reads the first section and decides whether the run may continue.
Common Setup Problems and Where They Come From
- Off-centre or wandering seam: usually strip guide alignment or coil centring; re-centre before forming more length.
- Loose or partially closed lock: roller pressure set for a lighter gauge; adjust to the active thickness before the batch continues.
- Out-of-round tube: mould or roller position for the wrong size, or strip feeding off-line; check on the first section.
- Surface marking on heavier gauge: over-compressed rollers or feed tension; ease the set and verify seam closure still holds.
- Frequent coiler stops: coil capacity too small for the run length; match coiler capacity to weekly continuous metres.
Read the first section for seam, roundness and gauge before releasing the batch
On every diameter or gauge change, run one short section and check seam evenness, finished diameter and edge finish against the drawing. A setup problem found on that section is cheap to correct; the same problem found after a full coil has run moves into rework and scrap.
Frequently Asked Questions
Is the 137 mm feeding strip the same as the duct diameter?
No. The 137 mm figure is the flat feeding strip width on the PD-1600, while duct diameter is the finished round section after wrapping, ranging 100-1600 mm on that machine. The strip is the material input; the diameter is the formed output.
Which tubeformer class covers large industrial mains?
The heavy-duty PD-2000 handles duct up to 2000 mm in 0.5-1.5 mm material with a reinforced frame, 15 kW motor and flying shear or slitter. The PD-1600 covers the commercial 100-1600 mm band in 0.4-1.2 mm.
How does gauge affect roller setup?
Heavier strip needs firm enough roller pressure to close the seam without springback; lighter gauge must not be over-compressed. The active gauge should be matched before the run, with the first section inspected for seam engagement.
Can a spiral machine produce flat oval duct?
Round spiral is formed on the tubeformer first, then reshaped into flat oval on a dedicated ovalizer downstream. The spiral line keeps producing round stock; ovalizing is reserved for shallow-void sections that need a flat-oval section.
Preda Care Service Promise
Every Preda Machine ships CE certified with a two-year warranty, backed by 24/7 technical support, free spare parts shipping, remote PLC programming assistance and a global agent network. A support engineer can review your diameter ranges and gauge mix against the PD-1600 or PD-2000 range before you commit to a model.
Size the Spiral Line to Your Real Diameter and Gauge Mix
Share the diameter ranges, gauges and weekly metres your projects repeat most often, and we will match them to a fixed-mould or heavy-duty tubeformer, including the strip and first-section setup routine that keeps seam geometry consistent.
Compare Spiral Machines →